

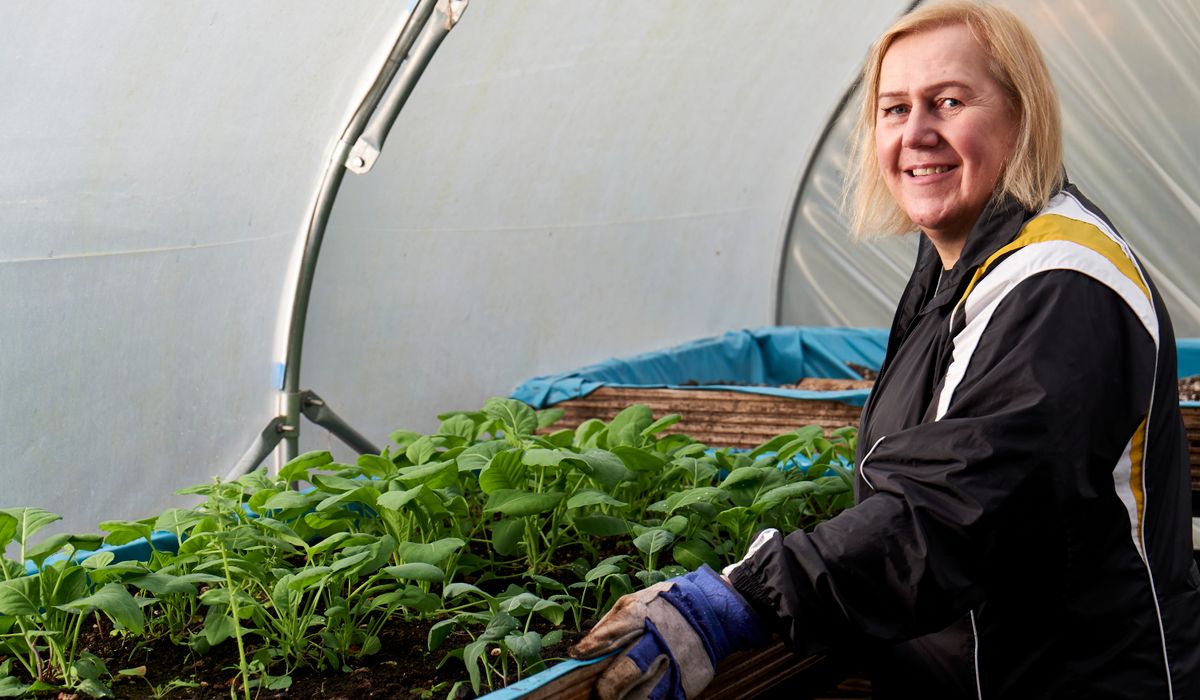
No-Dig Gardening in Raised Beds for Beginners
Why No-Dig Suits Raised Beds So Well
If you have ever spent a back-breaking afternoon double-digging a bed only to watch the weeds return within a fortnight, no-dig growing will feel like a revelation. The principle is simple: rather than turning the soil over, you smother what is already there with a light-excluding layer of cardboard, then build your growing medium on top with compost. Worms, fungi and soil bacteria do the rest of the work for you.
Raised beds are the perfect place to start because the sides hold your layers neatly in place. You are not fighting an established lawn, and you can control exactly what goes into the bed. The cardboard blocks light, so annual weeds beneath it die back, while the compost above gives you a clean, crumbly surface to sow and plant into straight away. There is no waiting a season for the soil to "rest" — you can be harvesting salad leaves within a month.
Choosing and Siting Your Bed
A bed around 1.2 metres wide is the sweet spot for most gardeners: you can reach the middle from either side without stepping onto the growing area, which matters enormously because compacted compost is the one thing you are trying to avoid. Length is flexible — 2.4 metres is a popular size, giving roughly 2.9 square metres of growing space.
- Depth: 20–30cm is plenty for salads, beans, roots and most brassicas. Deeper beds suit carrots and parsnips.
- Position: aim for six to eight hours of sun a day. A south or south-west facing spot is ideal; east-facing beds are fine for leafy crops.
- Base: leave the bottom open to the ground if you can. That allows worms to travel up and prevents waterlogging.
- Access: leave a 60cm path so you can kneel comfortably and wheel a barrow alongside.
If your only option is a hard surface such as paving or concrete, you can still grow no-dig — just use a deeper bed of 30–40cm and water more attentively.
Building the Layers
Start by cutting back any tall weeds or grass to ground level. No need to remove roots or turf; you are going to bury them. Then follow this sequence.
- Water the ground thoroughly before you lay anything down. Dry soil beneath cardboard stays dry for a long time.
- Lay plain brown cardboard in overlapping sheets, with a 15cm overlap at every join so no light sneaks through. Remove all tape, staples and plastic labels.
- Soak the cardboard with a hose or watering can until it is sodden and lying flat. Dry cardboard curls at the edges and lets weeds through.
- Add compost on top to a depth of 10–15cm. For a 1.2m by 2.4m bed, that is roughly six 50-litre bags. Well-rotted green waste compost, homemade compost or a mix with leafmould all work beautifully.
Do not dig the compost into the cardboard. The whole point is the layered structure: cardboard smothering below, rich compost feeding above.
Planting Straight Into the Bed
You can plant the same day you finish building. Push aside a handful of compost, make a hole with a dibber or trowel, and settle your plant in so the rootball sits at the same level it was in its pot. Firm gently and water well.
For seeds, sow directly into the compost in shallow drills. Fine seeds such as lettuce and carrots germinate happily in a tilth this crumbly. Good first-season crops include:
- Salad leaves, radishes and spring onions for quick wins
- Chard, kale and perpetual spinach for cut-and-come-again harvesting
- Courgettes, runner beans and French beans once the last frost has passed
- Winter salads and oriental greens sown in late summer
Plants that were started in modules — tomatoes, brassicas, leeks — transplant into no-dig beds with almost no check to growth, because the compost is loose and roots establish fast.
Watering and Feeding Through the Year
Raised beds drain more freely than open ground, so they dry out faster in a hot spell. Water deeply and less often, aiming at the base of plants rather than the foliage, and water in the morning where possible. A 5cm mulch of homemade compost or grass clippings over the surface locks in moisture and keeps the cardboard hidden from light.
Feeding is mostly handled by the compost itself. Hungry crops such as courgettes and tomatoes appreciate a liquid feed of comfrey or a general organic tomato feed once flowers set. Each autumn, spread another 5cm of compost over the bed surface and let the worms pull it down. That single annual top-up replaces everything digging would have achieved, and it takes about twenty minutes.
Beginner Mistakes Worth Avoiding
- Using glossy or laminated card: printed shiny packaging does not rot down properly. Plain brown corrugated card is what you want.
- Skipping the overlap: gaps at the seams are the number one cause of weeds pushing through in spring.
- Filling with subsoil or cheap topsoil: you will be back to square one. Spend your budget on compost.
- Treading on the bed: keep your weight on the paths. Compaction undoes the whole approach.
- Panicking about slugs: they will appear, especially in wet springs. Evening patrols, beer traps and encouraging frogs and hedgehogs keep them in check.
Give it one full season and you will notice something lovely happening. The compost darkens, worms appear in numbers, and the surface stays soft enough to push a trowel in with one hand. That is the no-dig bed quietly getting better while you simply get on with growing.


Greenhouses
-
Sow hardy lettuces, rocket and mizuna in autumn, protecting them from frost with fleece or a polytunnel cover.


Cold Frames

-

Long established fact that a reader will be distracted
-

Long established fact that a reader will be distracted
-

Long established fact that a reader will be distracted


Polytunnels
Karla Gleichauf
12 May 2017 at 05:28 pm
On the other hand, we denounce with righteous indignation and dislike men who are so beguiled and demoralized by the charms of pleasure of the moment
M Shyamalan
12 May 2017 at 05:28 pm
On the other hand, we denounce with righteous indignation and dislike men who are so beguiled and demoralized by the charms of pleasure of the moment
Liz Montano
12 May 2017 at 05:28 pm
On the other hand, we denounce with righteous indignation and dislike men who are so beguiled and demoralized by the charms of pleasure of the moment